Managing Maps
Since you are logged in, now the Maps menu contains two options. The first option allows you to view and query existing Maps in the portal as before while the second new one to create your own map and save it into the portal.

Maps menu
Creating Map
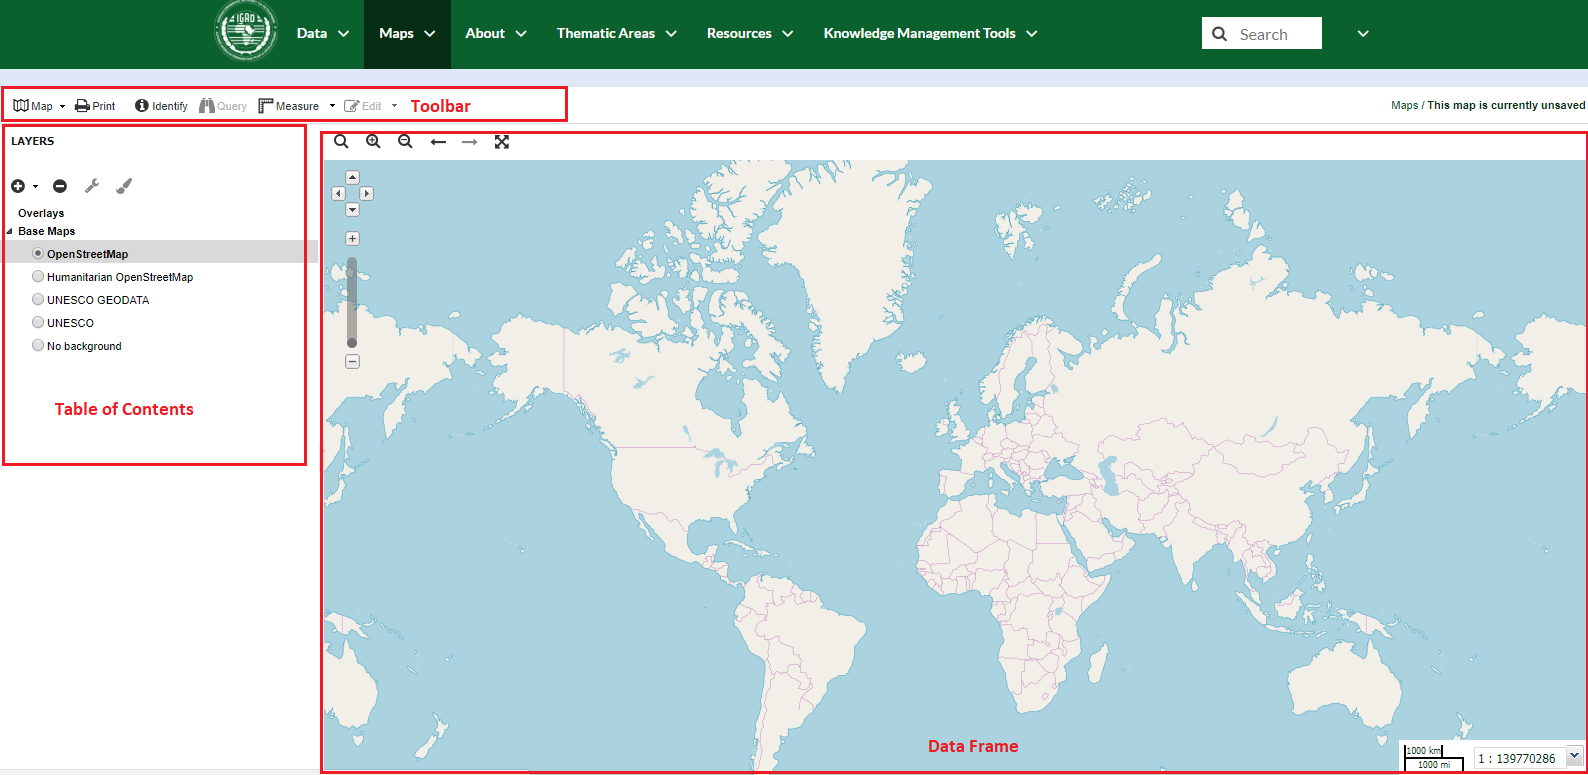
- Click on Create Map. An interactive WebGIS interface will open, containing:
- A toolbar on the top.
- A table of contents (TOC) or layer list on the left side.
- A Data Frame space where layers are displayed. The Data Frame shows the OpenStreetMap basemap layer by default. There are other service layers available here such as Humanitarian OpenStreetMap, UNESCO GEODATA and UNESCO.
From the TOC Click on Add layers.

From the list Double Click on the layers that you want to add to your map then Click on Done.
Order your layers by dragging the point layers on the top of the TOC then the lines and the polygons and Choose a basemap.
If you want to edit the style of the active layers in the map. Select the target layer then Click on the brush icon and follow the Steps in Layer Styling section.

After all the edits, Click on the Map button from the toolbar then Select Save Map.

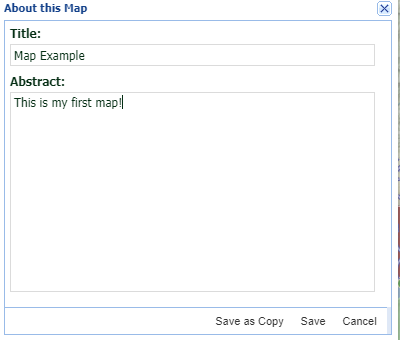
Assign a name to the map and an abstract then Click on Save.

Your map will be approved by the administrators.

Sharing Map
From the toolbar, Click on on the Map button then Select Publish Map.

A new dialog will appear with instructions on how to embed this map in a webpage, including a code snippet. You can adjust the parameters as necessary.

Try instead to copy and paste the http URL of your map in a browser. You will be able to view your map.


